-
Get Oriented
Follow along with the steps in this tutorial by opening the import page.
-
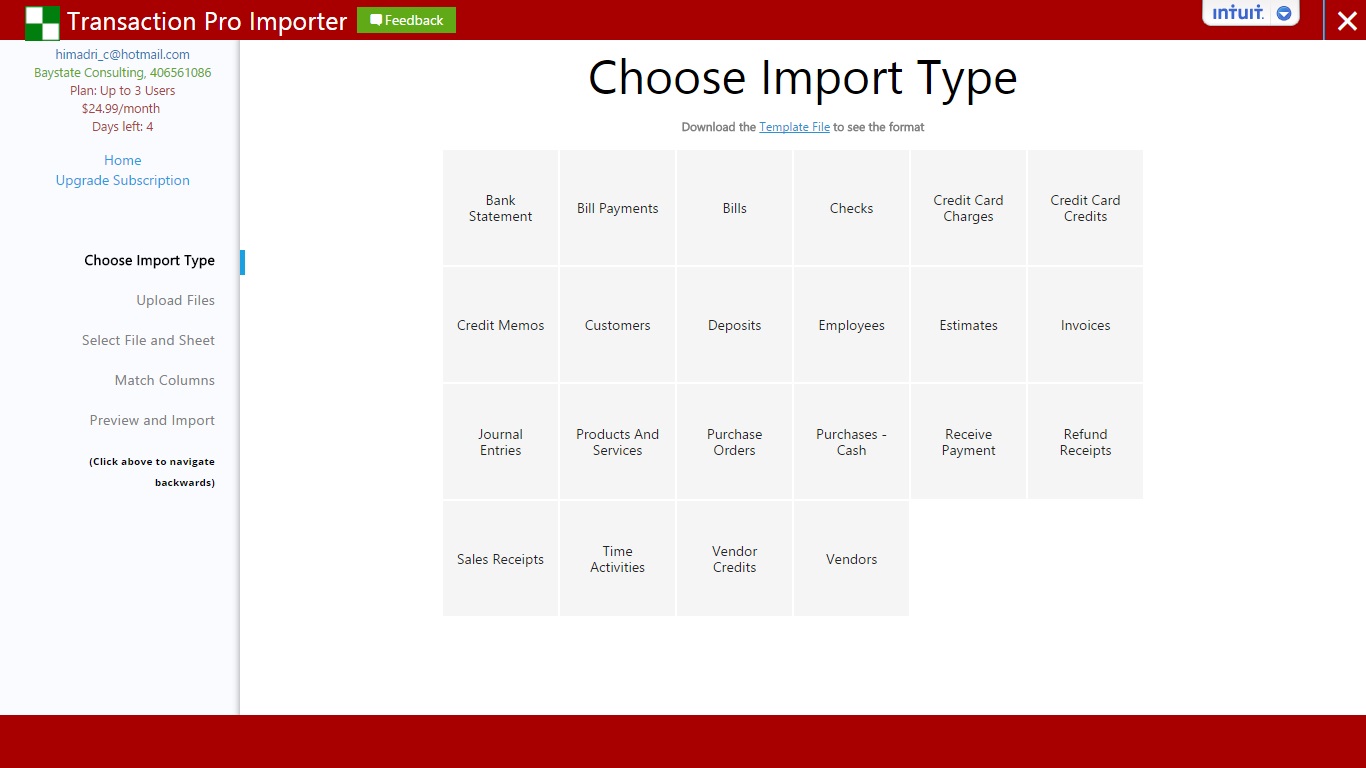
Choose Your Import Type
The available types are:
- Account
- Bank Statement
- Bill Payments
- Bills
- Checks
- Credit Card Charges
- Credit Card Credits
- Credit Memos
- Customers
- Deposits
- Employees
- Estimates
- Invoices
- Journal Entries
- Products & Services
- Purchase Orders
- Purchases - Cash
- Receive Payments
- Refund Receipts
- Sales Receipts
- Time Activities
- Vendor Credits
- Vendors
Download sample template file
-
Upload Your Data
Supported file types are Excel (.xlsx and .xls) and csv (.csv).
File sizes are limited to 4MB per import.
If you are on a Mac and you use Numbers (spreadsheets), then
you can export to Excel by following the directions here.
Headers should be on the first row or line
|
|
A |
C |
D |
| Headers |
1 |
Bill Number |
Doc Number |
Vendor Name |
Transaction Date |
|
2 |
1 |
|
Vendor 1 |
5/11/2014 |
|
3 |
1 |
My Doc Number |
Vendor 1 |
5/11/2014 |
-
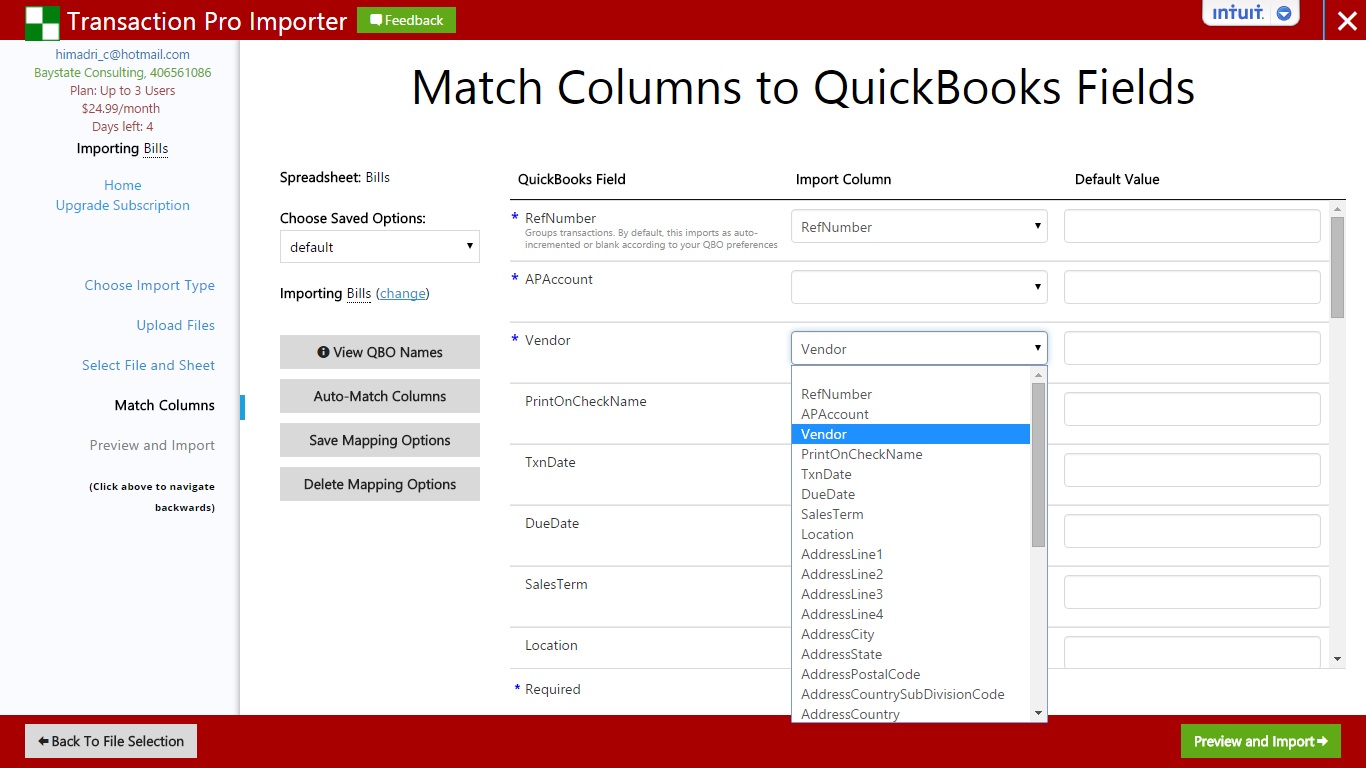
Match QuickBooks Online Fields to Your Data
The first column corresponds to QuickBooks Online fields.
The second column corresponds to your data.
The 'Default Value' column will fill any blank data in the import column. This field is completely optional.
-
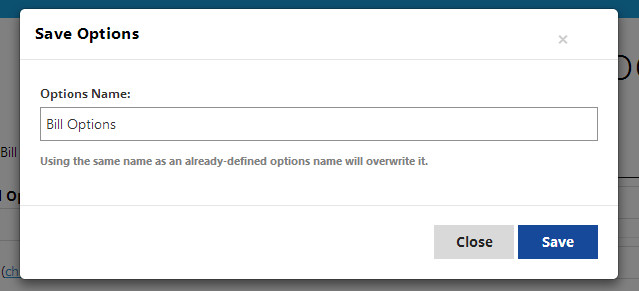
Save Your Options for Another Import (Optional)
You may save your column mappings and default values for another import.
This is useful for future imports with the same headers.
You may save as many sets of options as you need as long as they have different names.
-
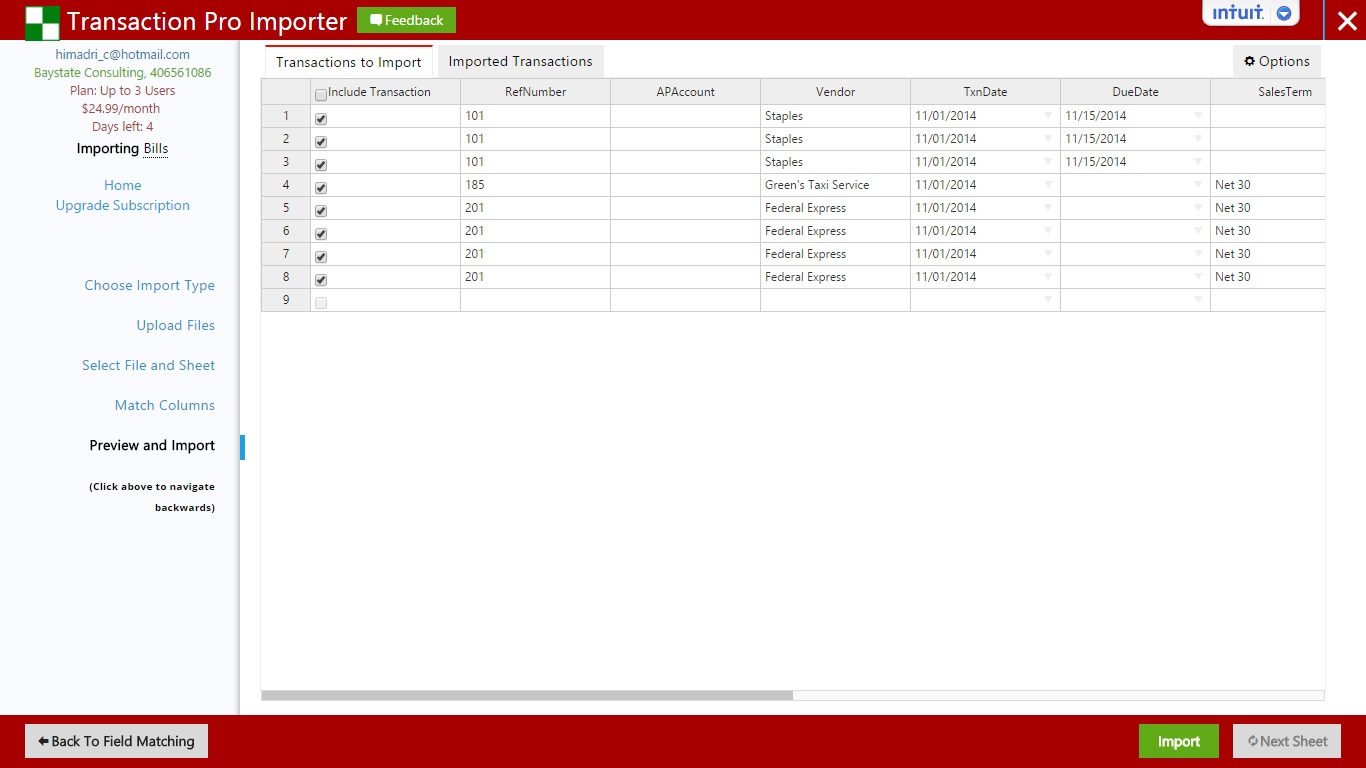
Verify and Import
Verify and edit your data before importing into QuickBooks Online.
Important. The first column determines which rows are imported.
Important. The second column in the preview is used to group transactions.
Rows with the same value are part of the same imported transaction.
Any errors during the import process will be returned for you to review.
Please carefully read the messages corresponding to these errors by clicking on the highlighted cells in the table.
Errors highlighted in red are determined by Transaction Pro Importer when your information is invalid.

Errors highlighted in yellow are business validation errors from QuickBooks Online.
These errors indicate that your data is formatted correctly, but the values do not make sense for your company's profile.
